Gus’s Tale

Prepped Beam....ZIRCONA COPINGS
Gus (Fig. 1) is an eminent and highly accomplished city architect with a great sense of style, creativity and aesthetics. He also has a phobia of all things dental. We met a few years ago when he turned up on my doorstep with his partial acrylic upper denture in pieces and asked if it could be repaired? I suggested that he needed to see a dentist but he was adamant that he would not and asked if I would repair it as he had an important meeting to go to. I succumbed, repaired it and he was very grateful and happy.
Six months later he was back with charm and a promise that if I repaired it he would go and see a dentist. The following year he was back with three remaining upper teeth blowing in the breeze and yet again his denture in pieces. This time I stood firm and insisted he let me arrange an appointment with one of my clients. With some persuasion – not least because he was unable to function dentally, with resulting weight loss – he reluctantly acquiesced. An alginate impression taken by the dentist put pay to one of the remaining teeth and the last two soon followed.
Treatment
Stage 1: Preparation and implant placement
An alginate pick up impression was taken of the repaired and extended denture (Fig. 2a). As the maxilla was now completely edentulous, the last three teeth were added to complete the arch. The denture was tidied up as best it could be so as to be used during the initial stages of treatment (Figs. 2b – c).
Seven implants (NobelBiocare – Branemark) were placed (Fig. 3a) and a fixture head impression taken. Healing caps were then screwed on to the fixtures and the denture relined with a soft (conditioning) liner and refitted (Fig. 3b).


Stage 2: Temporisation
The fixture head impression was poured and a resin (Pattern resin LS – GC) framework fabricated on six of the fixtures using temporary cylinders (Figs. 4a – b).
Teeth (Heraeus Premium – Heraeus Kulzer) were set onto the framework for a tooth try – in (Figs. 5a – b). The set up was tried in and the tooth arrangement was customised to Gus’s satisfaction (Fig. 6).
Back on the model, indices (Lab Putty – Coltene Whaledent) were fabricated of the tooth position from the try – in. The indices were used as a guide for the fabrication of the definitive teeth.
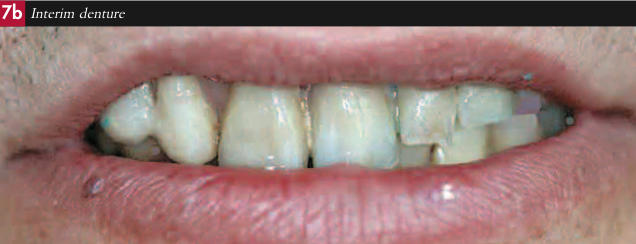
The try-in was then processed in autopolymerising resin (Palapress – Heraeus Kulzer) and used as a fixed temporary to replace the denture and to load the fixtures (Figs. 7a – c).


Stage 3: Definitive restoration
Definitive, cast to, gold copings with plastic chimneys were screwed in to the implant replicas on the master cast. A castable resin framework was then constructed to the copings (Pattern Resin LS – GC) (Figs. 8a – b).


Using indices taken of the trial set up, a full contour wax up was poured to the framework (Fig. 8c). A beam framework with individual tooth preparations was fabricated by cutting back the wax up (Fig. 9a). This was sprued (Fig. 9b), invested and cast in a beam gold alloy (BiO Degulor M – Degudent). The cast framework was checked back on the master cast (Fig. 10a) and then tried in the mouth to confirm fit (Fig. 10b).
The metalwork with its tooth preparations was refined (Fig. 11a), sprayed with a photosensitive powder (Fig. 11b) and then digitally scanned (Cerec In EOS – Sirona) (Fig. 11c).


Virtual images (Figs. 12a – c) captured by the scanner were used to design the copings to be milled in Zirconia.
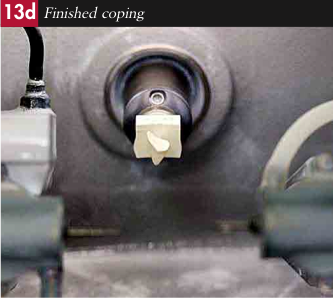
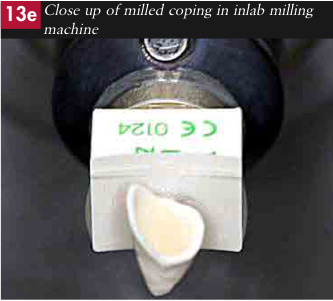
The Zirconia copings were milled (Cerec in Lab – Sirona) (Figs. 13a – e) and sintered overnight (ZYrcomat – Vita) (Figs. 14a – b).


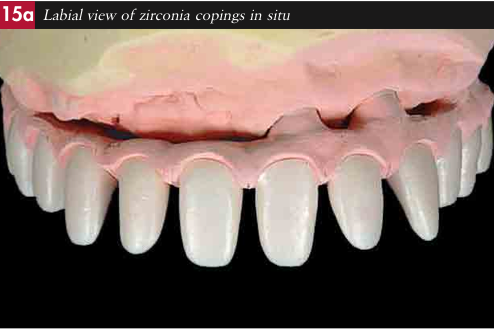
Once trimmed and heat treated, ceramic (VM9 – Vita) was applied to the individual copings (Figs. 15 a – e).
Except where screw holes are located under the crowns the rest of the crowns were definitively cemented to the framework (Panavia – Kurarary Co.) (Fig.16). The removable teeth were then seated and the gingiva waxed up (Fig. 17).


After the access teeth were again removed, a putty mould was made of the gingiva, the wax boiled off, the metal opaqued with a pink, light cured opaque composite (Figs. 18a – c), the mould reseated and the gingiva poured in an autopolymerising resin (Palapress – Heraeus Kulzer) (Figs. 19a – c). Once trimmed and polished it was ready for fitting (Figs. 20a – d).


Stage 4: Fitting the restoration
The temporary restoration was unscrewed and removed and the definitive screwed into place and torque tightened (Figs. 21a – b). Lastly the remaining crowns were cemented over the screw access holes using a temporary cement to facilitate removal for access at future times (Fig. 22).


Summary
After many years of neglect with resulting periodic tooth loss until only three unsalvageable teeth remained in the maxillary jaw, our city architect was finally restored to full dental health and function with an aesthetic appearance, much to his delight (Figs. 23a and 23b). Health is maintained with the assistance of superfloss and a waterpik. The screw retained structure is periodically removed for more extensive hygiene maintenance.
Steaks are back on the menu and a fuller physique regained.

